
Introduction
Installing a racing exhaust is one of the most popular motorcycle upgrades among enthusiasts who want better performance, a more aggressive exhaust note, and a sportier appearance. However, common mistakes when installing a racing exhaust often prevent riders from enjoying these benefits. Even a high-quality exhaust system cannot deliver its best performance if someone installs it incorrectly. Small installation errors can reduce engine efficiency, create exhaust leaks, increase vibration, and shorten the lifespan of both the exhaust and the motorcycle.
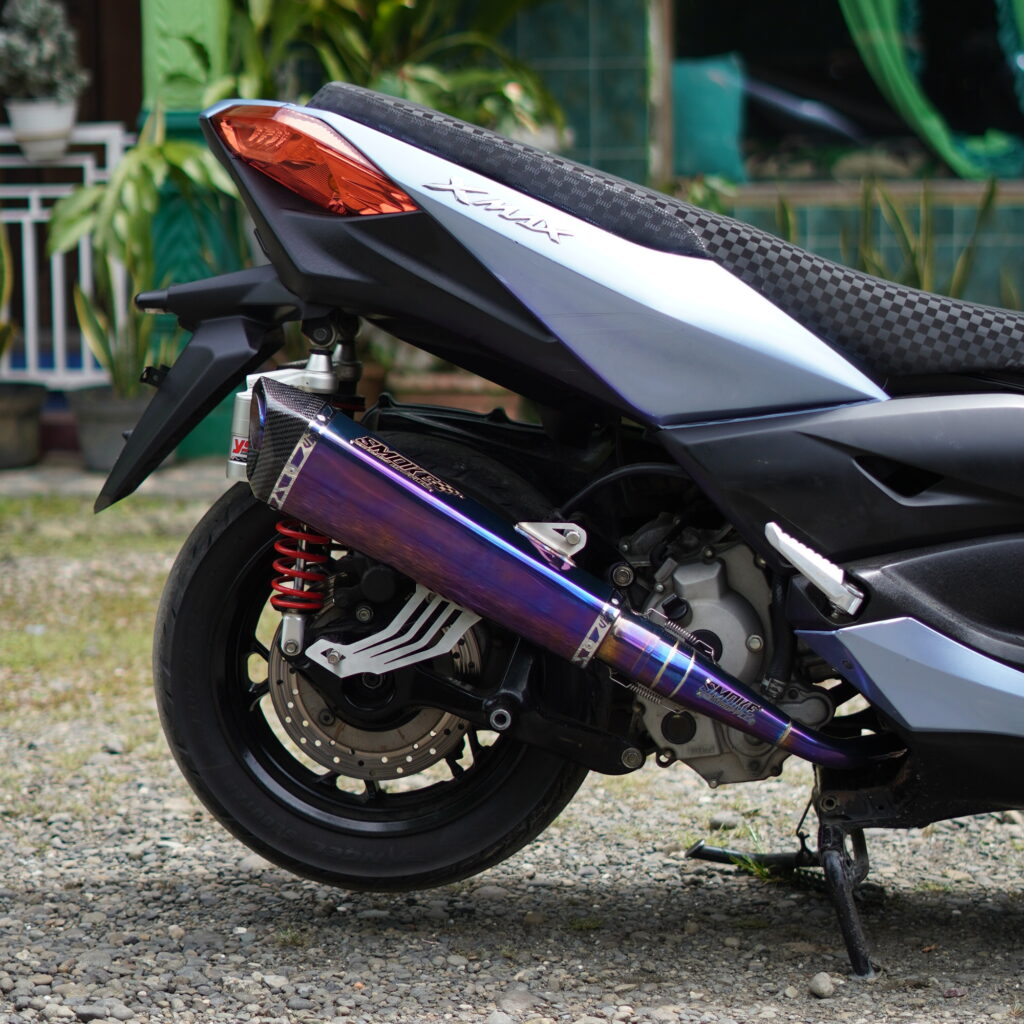
Many riders assume that replacing an exhaust is a simple task that only requires removing a few bolts. In reality, proper installation demands careful preparation, the right tools, and attention to detail. Every component must fit correctly, every bolt must reach the recommended torque, and every connection must remain leak-free.
Understanding the common mistakes when installing a racing exhaust helps riders avoid unnecessary repair costs while ensuring maximum performance, durability, and riding safety. Whether you install the exhaust yourself or ask a professional mechanic for assistance, learning these common errors will help you achieve the best possible results.
Common Mistakes When Installing a Racing Exhaust
Although installing a racing exhaust may look straightforward, several mistakes continue to appear among beginner and experienced riders alike. Recognizing these problems before installation can save time, money, and frustration.
Ignoring the Manufacturer’s Instructions
Many riders skip the installation manual because they believe every racing exhaust follows the same installation process. Unfortunately, every manufacturer designs its products differently.
Each exhaust system includes specific mounting brackets, clamps, springs, oxygen sensor locations, and torque specifications. Ignoring these instructions often causes improper alignment or loose connections.
Before starting the installation, carefully read the entire manual. Organize every bolt, washer, bracket, and spring beforehand. This preparation makes the installation process smoother while reducing the possibility of missing important steps.
Reusing an Old Exhaust Gasket
One of the most common installation mistakes involves reusing the original exhaust gasket.
The gasket creates an airtight seal between the cylinder head and the exhaust header. After years of exposure to extreme heat, it gradually loses its elasticity and sealing capability.
Installing a new racing exhaust with an old gasket usually results in exhaust leaks. Riders may notice a ticking sound during acceleration, reduced engine performance, or inaccurate oxygen sensor readings.
Replacing the gasket costs very little compared to repairing problems caused by exhaust leaks. Therefore, always install a brand-new gasket whenever you replace the exhaust system.
Tightening Every Bolt Too Early
Another common mistake occurs when riders fully tighten the mounting bolts before aligning the entire exhaust system.
Doing so places unnecessary stress on the exhaust pipe because each section loses its flexibility during installation. Consequently, the exhaust may sit unevenly or place excessive pressure on the mounting points.
Instead, install every bolt loosely first. After confirming that every pipe section aligns correctly, gradually tighten each fastener according to the recommended sequence.
This technique allows the exhaust to settle naturally while preventing unnecessary strain on the brackets.
Ignoring Torque Specifications
Many motorcycle owners rely solely on hand strength when tightening exhaust bolts. Although experienced mechanics sometimes estimate torque accurately, guessing often creates problems.
Overtightened bolts may strip threads, crack brackets, or damage the aluminum cylinder head. Meanwhile, loose bolts can gradually loosen even further because of constant engine vibration.
Using a torque wrench ensures consistent clamping force throughout the installation process.
Following the manufacturer’s torque specifications also improves long-term reliability while protecting expensive engine components.
Installing the Exhaust Without Checking Component Clearance
Some riders focus only on attaching the exhaust while forgetting to inspect the surrounding components.
Every racing exhaust should have sufficient clearance from nearby motorcycle parts, including:
- Swingarm
- Rear brake pedal
- Engine casing
- Oil filter
- Fairings
- Passenger footpeg
- Rear suspension
If the exhaust touches any of these parts, engine vibration can produce rattling noises and accelerate wear.
After completing the installation, inspect every section carefully. Compress the rear suspension if possible to confirm that the exhaust maintains adequate clearance throughout its movement.
Forgetting to Reinstall the Oxygen Sensor
Modern fuel-injected motorcycles rely on oxygen sensors to monitor exhaust gases and maintain the proper air-fuel ratio.
Unfortunately, some riders forget to reinstall the sensor after replacing the exhaust. Others install it loosely or twist the wiring excessively.
These mistakes may trigger the check engine light and reduce engine efficiency.
Always reinstall the oxygen sensor securely and route the wiring away from excessive heat. If the racing exhaust requires an adapter, use only compatible components recommended by the manufacturer.
Skipping ECU Adjustment When Necessary
Not every racing exhaust requires ECU tuning. However, high-flow exhaust systems often change exhaust gas velocity enough to affect engine performance.
Without proper fuel adjustments, the engine may operate with a lean air-fuel mixture.
Several symptoms may appear, including:
- Slower throttle response
- Engine hesitation
- Higher operating temperatures
- Exhaust popping during deceleration
- Reduced fuel efficiency
If your motorcycle manufacturer or exhaust producer recommends ECU remapping, complete the adjustment immediately after installation.
Proper tuning allows the engine to utilize the improved exhaust flow efficiently while maintaining optimal combustion.
Overlooking Exhaust Springs and Clamps
Many slip-on and full-system racing exhausts use springs and clamps to secure different pipe sections. Although these components look simple, they play a critical role in maintaining a tight and stable connection.
Some riders install the springs incorrectly or fail to tighten the clamps evenly. As a result, the exhaust joints may shift while riding, creating leaks or unwanted vibrations. In addition, loose clamps can allow hot exhaust gases to escape, which may affect engine performance and increase noise.
Before starting the motorcycle, inspect every spring and clamp carefully. Make sure each spring sits firmly in its mounting holes and every clamp applies even pressure around the pipe connection. Spending a few extra minutes on this inspection can prevent expensive repairs later.
Failing to Check for Exhaust Leaks
Completing the installation does not mean the job is finished. Unfortunately, many riders skip the final inspection because the exhaust already looks secure.
A visual inspection alone cannot confirm that every joint seals properly. Therefore, start the engine and let it idle for several minutes. Listen closely around the header, mid-pipe, and muffler connections. A ticking or hissing sound usually indicates an exhaust leak.
You should also feel for escaping air near the joints without touching the hot exhaust surface. If you notice any leak, turn off the engine immediately and correct the problem before riding.
This simple procedure protects engine performance while preventing unnecessary wear on nearby components.
Removing the Heat Shield
Some motorcycle owners remove the heat shield because they prefer a cleaner or more aggressive appearance. However, this decision often creates unnecessary risks.
The heat shield protects the rider, passenger, plastic fairings, electrical wiring, brake hoses, and other nearby components from excessive heat. Without it, high exhaust temperatures may damage surrounding parts over time.
Furthermore, removing the heat shield increases the possibility of accidental burns, especially during daily commuting or long-distance touring.
Unless the manufacturer specifically recommends removing it, always keep the heat shield installed.
Skipping the First Inspection After Installation
Many riders believe the installation process ends after the first successful ride. In reality, every new exhaust system experiences repeated heating and cooling cycles during its first few rides.
These temperature changes cause metal components to expand and contract. Consequently, some mounting bolts, clamps, or brackets may loosen slightly.
For this reason, inspect the entire exhaust system again after riding approximately 50 to 100 kilometers.
Check every mounting point, verify bolt torque, and confirm that no exhaust leaks have developed. This routine inspection significantly improves long-term reliability.
Choosing Style Instead of Compatibility
A racing exhaust should never be selected based only on its appearance or sound.
Many riders purchase an exhaust simply because it looks attractive online or produces a louder exhaust note. Unfortunately, not every exhaust fits every motorcycle correctly.
Before purchasing a racing exhaust, verify the following:
- Motorcycle model compatibility
- Engine displacement compatibility
- Oxygen sensor compatibility
- Mounting bracket compatibility
- Emission regulation compliance
- Local noise regulation compliance
Choosing the correct exhaust ensures an easier installation process and delivers the performance improvements you expect.
Using Improper Tools During Installation
Another mistake that many riders underestimate involves using the wrong tools.
For example, adjustable wrenches, worn sockets, or incorrect-sized Allen keys can damage bolt heads and make future maintenance more difficult. Likewise, forcing bolts into place with excessive strength may damage the threads on the engine or mounting brackets.
Instead, prepare the proper tools before beginning the installation. A quality socket set, torque wrench, spring puller, and Allen key set will make the process safer and more precise.
Using the right equipment also reduces the risk of damaging expensive motorcycle components.
Forgetting Routine Maintenance After Installation
Installing a racing exhaust is only the beginning. Like any other motorcycle component, the exhaust requires regular maintenance to maintain its appearance and performance.
Periodically inspect all mounting bolts, springs, clamps, and brackets. Clean the exhaust according to the manufacturer’s recommendations, especially if it is made from stainless steel or titanium. Removing dirt, road salt, and moisture helps prevent corrosion and keeps the exhaust looking its best.
In addition, pay attention to unusual noises or vibrations during every ride. Detecting small problems early prevents them from developing into major repairs.
Routine maintenance allows your racing exhaust to deliver consistent performance for many years.
Conclusion
Understanding the common mistakes when installing a racing exhaust can help every motorcycle owner achieve better performance, greater reliability, and improved riding safety. Most installation problems occur because riders rush the process, ignore the manufacturer’s instructions, reuse worn components, or skip important inspections.
A successful installation requires patience, proper tools, accurate torque settings, careful alignment, and thorough leak testing. Riders should also replace the exhaust gasket, reinstall the oxygen sensor correctly, verify ECU requirements, and inspect the exhaust again after the first few rides.
By avoiding these common mistakes, you can maximize the benefits of your racing exhaust while protecting your motorcycle from unnecessary damage. Whether you perform the installation yourself or hire a professional mechanic, following the correct procedures will ensure your exhaust system performs exactly as intended.
